Annual Mandala Collections

I did want to take the opportunity to say thank you to all of you that have stayed loyal throughout the years. Although this site is only a year old, I have been working on bringing content to you for several years. I really do enjoy being creative every day, and I love even more to share it with all of you.

Each year, I have decided that I am going to create a Mandala Collection that can be sold as individual prints, or as a set of 3 or 5 mandala prints. I have done this for two years in a row and I am gearing up for my third year. But before I dive into that, I thought we would go take a look at the two previous years so that you can see what I am talking about first hand.

Mandala Collection I – 2017

Take a look at the posts for each one below, it will give you an insight into what was going through my head while creating them. This was my first year and I was not sure of how well I would do, or if this challenge would be too much for me. The theme of the first year was using black and white on gradient paper. These pictures do not show true justice for the design, but I promise you they look better in person.

Mandala Collection I, Mandala 1

Mandala Collection I, Mandala 2

Mandala Collection I, Mandala 3

Mandala Collection I, Mandala 4

Mandala Collection I, Mandala 5

Not too shabby for my first collection, if I do say so myself. I learned a lot of things throughout the year and was able to adapt the second collection into something a little different, and yet similar.

Mandala Collection II – 2018

The theme for the 2018 year was using mixed media and triangles. Each mandala has an organic feel to them and yet each one is adorned with sharp edges. This collection also looks better in person, and as soon as I can get a studio area set up with great light, I will take better pictures to share with you.

Mandala Collection II, Mandala 1

Mandala Collection II, Mandala 2

Mandala Collection II, Mandala 3

Mandala Collection II, Mandala 4

Mandala Collection II, Mandala 5

Mandala Collection III, 2019 – Coming Soon!

I would love to know what theme you would like to see in the new collection. Don’t be shy, I never throw an idea away. Comment in the section below! I look forward to hearing from you!

Mandala Collection II, Mandala 5

WE MADE IT! The final mandala in the collection is complete and I can’t wait to share it with you. First off, If you would like to see the previous mandala in the collection, visit the link below.

Mandala Collection II, Mandala 1

Mandala Collection II, Mandala 2

Mandala Collection II, Mandala 3

Mandala Collection II, Mandala 4

You may also look in my YouTube Video which does a complete recap of the full collection and the progress from beginning to end!

Ok, so now let’s continue with the fifth and final mandala in this collection! First of all let me say that this mandala was inspired by my 100mandala community, who have been giving us great challenges to help us think outside the box.  This mandala was inspired by the triangle and circle progression. It was a lot of fun to make and very easy once you got the hang of it.

I have always loved the way that flowers with many petals look and feel when drawing mandalas. The two rows of petals gave this mandala a look that drew your eyes to either the triangles or the circles, even both. Take a glance at the picture below, which pattern do you see most. I fell in love with using the metallic paint markers, it was more of a matter of choosing the color I wanted. Of course, I chose silver.

Many of you know that a lot of my mandala are inspired by Zentangle and other patterns I see in the world around me., and this one was no different. I knew that I wanted to fill the empty spaces with an organic Zentangle pattern I have used before.

As soon as I finished the inner circle, I had to outline the outer circle as well. It was perfect! I saw the flowers, leaves, and vines beneath, all neatly tucked within this triangle and circle progression. Once it was all completed, I was very happy with it. This mandala is far out of my element, and yet I am very pleased with the relaxation techniques it taught me in the process.

What is your favorite part of this mandala? Be sure to check out the video and give your feedback as well.

Scalloped Table Update!

In my previous post here, you will find that I left you off on a completed design but it was all on paper.  I was very excited to start on the table but was still waiting on my Posca pens to arrive from Japan. They have the extra fine tip I was looking for. So, while I waited for the 25 day shipping projection, I started to start my grid on the table in pencil.

Session Three – Photo by Charity Woods

This was like the easiest part but it took me over 3 hours to complete. I decided that since this table would set me back quite a few hours, I would need to break up my time into blocks, 3 hour blocks. Since I had drawn out with details, the rough draft on paper in 6 hours, (2 sessions) I really thought that this part would take me longer, but instead of adding all the details, I just simply lined out a grid and left a lot to the imagination. What I found was that I had started changing the design slightly within the pencil outline.

One my next session, I didn’t make it near as far as I thought I would. By the time the three hours were done, I was amazed that I hadn’t made significant progress. Knowing this was paint, I was really trying to make sure there were no mess-ups. I didn’t want to have to redo the whole table.

This was no where near the detail that I wanted to do in the center, but in order not to get discouraged, I decided quickly that I would take my time and appreciate every step along the way. One of the amazing things that I discovered was that I was changing my pattern from the original one I drew on paper. Not drastically, but enough because I felt the table moving in a different direction. Its very difficult for me to draw the same thing twice in a row, they are always a little different.

Moving on to the fifth session. I made a lot more progress on this session, but I think maybe it was mostly because the elements were a lot smaller, and there wasn’t a lot of major design issues, but I will tell you that I can’t decide if my hand hurt more from this session or the sixth, which is where I added a lot of swirls.

A couple things I wanted to point out on this design point. The leaves, I think, photograph very well and I typically don’t do such a small design element at this point in any mandala. It seemed extremely too simple when I finished (Photo 1, Session 5). After adding the next level of that design, the entire ring came to life and looked way more detailed than I thought it would. After such a detailed design, I decided to outline the next ring bringing in just a few elements to break this level up from the next. Finally, I did my basic overlap triangle that is the base for so many designs. I felt like this was a great place to stop until I could figure out exactly what I was going to do.

Session six was killer! All of the swirls and the tiny details had my hand cramping at the end. If you’re keeping track, this is now 18 hours into this project. But the payoff of seeing my momma’s face when I am all done, will totally be worth it. If I am going to give her something that is “me” I am going to make it all the elements of me. Structured, yet flexible. Fun, yet functional. This table has been such a blessing to me to design so far.

Session six was the end of my first Posca pen. But I had one more, so I could continue on the next day. The final picture in Session six, sorta gives you an idea of how far I have come and just how far I still have to go to complete this table. Overall, I think its turning out far better than I could have imagined when I started.

Session Seven was very interesting. I painted this while watching White Christmas and trying to get well from a bout of sickness that had me couch ridden the day before. What better way to make myself feel better than to pull up my rocking chair and get to work.

After adding the final touches to the outside, I finished the whole table off with some flowers that mimic the scalloped edges of the table. (Pictured Below) Before I gave this finished table to my mom, I coated it with two layers of clear coat that I purchased in a spray can from an art supply store. It seems to seal in all the colors and there was no feathering as a result of the spray coat being used.

Overall, this project was such a joy to do and it was ready before Christmas. Not only did my parents love this table, it is now proudly displayed in their bedroom. I would love to know your favorite part of this project and what you would like to see in the future.

Christmas Presents!

I know I know! Christmas is already over, but now that all the gifts that I made have been well-received I thought I would share them with you. Each year I love to give gifts that I have created. I love to create something that makes them think of me and the memories we have together when  they see them. They are also personalized so that they meet the needs of the person and their tastes.

Ok, I want to start off with one of my favorite type pieces. A very dear friend of mine went through a tough time and didn’t believe that they would get through it. However, after they rose from the ashes of that destruction, we started to talk about how they were like the Phoenix. Every year, I give this friend something that goes along with the theme of rising above your circumstance and setbacks. Each year is a new beginning. You can check out last years here. And the one for this year was a beautiful staff, since we are both nerds, that is designed after the Phoenix.


This was drawn with my black .03 Staedtler Pigment Liners, and colored with red, orange, yellow, grey and brown Steadtler Color Pencils. I then decided that taking the grey color pencil and rubbing it lightly over the outer edge of the paper gave the whole thing a new look. Overall, I’m happy with how this turned out and have already started researching phoenix ideas for next Christmas. If you have any ideas, I would love to hear them.

Onto the second gift, I was gifted a smaller lazy susan. It was made from bamboo, but had some apples painted on the top of it.  I wanted to do something very personal for my sister-n-law and her new husband. I knew that they would appreciate a handmade gift. So, I had my fiance’ sand down the top and it left a beautiful finish. Then, I started working from the inside out. Starting with the first letter of her new last name, “S.”

After surrounding the monogram with a very detailed mandala, I then erased my guidelines (still in the picture above) and put two clear protective coats on it. On the night we gave this gift, It was immediately put to use under the salad bowl in the center of the table.

The last, but certainly NOT least, gift that I made personally, was for my fiance’s parents. They have been such a wonderful blessing in my life and I wanted to give them something that represented family and unity. So, like the last gift, I chose to do a monogram again, but with my fiance’s parents last name letter “L”. But unlike the last gift, I chose to paint this on a black square canvas that I had.

I decided that using my gold paint pen from my table project gave this piece the life it was searching for. I absolutely love how it turned out and they seemed to as well. I am truly blessed to be able to share my talents with those around me.

Although these were not the only gifts I gave for Christmas, they were the most personalized gifts and I wanted to share them with you. Please let me know in the comments below, which was your favorite and why. I would also love to know any ideas you may like to see in the future.

2017 Year in Review

Happy New Year!

I want to create a special post that sorta sums up my year for 2017. You know that although I had been blogging since 2016, I only got my own website in 2017. Boy have I been blessed with this outlet to share my creativity and inspire others to do something creative every day.  There are several things that I am going to discuss, to include my subscription to Sketchbox, My first Mandala Collection, Christmas Gifts I created and my favorite creations of the year. So grab your cup of coffee or your favorite beverage and lets get started!

SketchBox

For those of you that don’t know, Sketchbox is a monthly subscription box for artists to try out different mediums. I have really been excited by everything that I have been able to create using the products I have received through these boxes. Some of my favorite products include a watercolor sketchbook, a full sepia Copic fineliner set, and last but not least watercolor pencils, this is only to name a few. If you would like to go back and review my unboxing posts you can visit them by clicking on the links below.

May  

June

JulyJuly Grab box  

August

September

October

 November

December

Mandala Collection I

For me, this was a huge accomplishment.  I wanted to start a collection of the mandala that was similar and yet different at the same time. For this collection, I chose to draw my mandala on gradient paper with black fineliners and a white gel pen. I was so happy how each one came out so different than the ones before.  Prints of these will be available in my shop once I get it all online. Stay tuned for this special collection. Each one of these mandalas are so special to me. I wrote a different post for each one, which you can visit below:

Mandala #1

Mandala #2

Mandala #3

Mandala #4

Mandala #5

Personalized Gifts

One of my favorite things to do is create something beautiful and personal for my friends, family, and co-workers. I truly enjoy the look on their face when they realize it is not only an original, but there are no others like it in the world. I want to share these few gifts with you.

Personalized Parties

Every birthday that happens in my house is a reason to celebrate. With the birthdays spread throughout the year, we are able to party all year long! Starting in February with my two from my previous marriage celebrating, then moving to my youngest two in June, oldest two in July and 3rd oldest in November. Mix that in with all the holidays and we rarely don’t have a reason to bust out some exciting party decorations. But also, because we have so many celebrations, It’s important that we get creative with them all, most of the decorations were homemade. Check out the following posts about my under the sea themed party for my youngest two.

Under the Sea

Octopus Guard

Sea Sponges

Jellyfish Mood Lighting

Furniture Painting

The absolute highlight of my year was creating a beautiful work of art for my mother. She brought this table to me and gave me no restrictions other than she wanted a Charity Original painted on top. Painted?! I’ve never painted anything detailed like the creations I have made.  Check out how this table progressed by clicking on the links below:

Scallopped Table #1

Scallopped Table #2

There are several other projects that I completed this year for Christmas Gifts to include a 12×12 personalized mandala painting on canvas, a monogrammed lazy susan and a phoenix staff for my best guy friend. All of these projects were special in their own ways and were hard to keep a secret for as long as I could since I love to share my progress pictures with the special people that received these gifts.

My Favorites of the Year


Final Thoughts

I do want to send out a special thank you for all of you that have supported me this year. I couldn’t have done this without you cheering me on. Special thanks to my fiance’ who has stuck by my side while I have spent the long hours trying to make something out of nothing. I love each and every one of you and I can only hope that in 2018, we will see a lot more growth from CraftyArtistKC. Help me make this year a good one by sharing my site with your friends family and social media accounts. I can’t wait to see what comes next!

Let me know in the comments below, what was your favorite project or post from this year!

Scalloped Table

So I have this table that my mom gave me to put my touch on it. After asking her several times what exactly she wants, she told me that she wants an original me. This touched my heart in ways you may not comprehend. Someone is taking pride in my work. To have a piece of my work out there is amazing to me.

So I decided I would go through the process with you. I have so many pictures of this process but lets start with the table itself. (pictured above). This table was pre-painted with the colors that will be in my moms bedroom, which is where she hopes to keep this table. How am I supposed to actually get the measurements of the scallops since they are different sizes? Well I’m glad you asked! I decided on taping 9 sheets of regular paper together to cover the complete top of the table. After I taped them together I placed the center piece in the center of the table and pressed outward on the paper to give me the size and shape of the top of the table.


After I got the correct shape, I started with a pencil and created the grid lines using a pushpin and paperclips since I didn’t have anything that was big enough to give me the circles I needed. I will say that even I was impressed with the way that the paperclips created a perfect circle no matter how far out I went.  I highly suggest using this method if you have a large area to work on.  It took about three hours to get to this point, from making the paper to creating the grid lines. From there I started to create the patterns that I liked. This took another 2 hours to draw out the pattern.

Starting the next evening, I began to ink up the pencil drawings. I spent roughly 3 hours on this part as well, changing so much as I went along. Because my art supplies are packed away, the only thing I had to use was a Prismacolor brush pen that was blue. The above image is the end of the second day. I decided to keep the mandala in reference by taking the picture with the 18-inch ruler I have.

[amazon_link asins=’B0032JX1MU,B00317ERM6,B000XAORTC,B000V59R8K’ template=’ProductCarousel’ store=’rafrti-20′ marketplace=’US’ link_id=’7801243f-c32b-11e7-978b-7193ebafc148′]

Finally, I decided to bring the inking all the way to the edge which was another 4 hours spent on detailing and changing the end product. The point of creating this piece on paper first is because I needed to measure out the full size of the mandala, as well as ensure that the mandala stopped where the scalloped edges started. Once I free-hand the pattern on the table, I will then create the patterns within the scalloped edges at that time.

Although this is not the final project, it does show the progression to the point where I am at currently. I have really enjoyed this process and can’t wait until I am able to transfer it onto the table. Look for a vlog on my YouTube channel about different mediums being tested to see how they interact with a protective coat on top. If there is a medium you would like for me to try, please comment below.

I will post again when I actually start putting the design on the table.  Let me know what you think so far!

August 2017 Premium Sketchbox

So I am going to be doing some catch up on these Sketchbox Unboxings. The main reason that I have fallen behind is that we recently bought a house and we had a month of searching, a month of packing and a month of moving in and unpacking. Now I am trying my best to catch up on all these boxes. So August through October will be late and November’s will be this month.

So let’s begin with August.  Every month, I receive a Sketchbox. This month, I have the premium box for $35 plus $5 shipping. The basic box is $25 plus $5 shipping. When you look at all the products inside, they all retail for around this. Now there are things that come every month, this includes; Sketchbox Sticker, Artist of the month box, Artist of the month tile, and a product description card. I will go through each of these items in detail below so that you can see what you get for the price.

In every box, you get a special inspiration piece from the featured artist of the month. The artist creates something from everything that is offered in the box each month. You can read more about the Artists of the month by clicking here. This month we received this gem:

So, what do you get in this months box? Sometimes you get more than $40 and other times you may get just under. In this months box, we received less than $40 worth of product. This month is all about unique paint pens so I’m not mad. Well, let’s take a look below!

2x Montana Acrylic Ink 25ml bottles – $9.50/ea

2x  .7mm Montana Acrylic Empty Markers – $4.25/ea

2mm Montana Acrylic Empty Marker – $4.25

Derwent Graphik Line Painter – $2.89/ea

Strathmore Artist Tiles – Black – $2.79/ea

Total Retail: $37.43

[amazon_link asins=’B00769H4RU,B006ZM19IE,B006ZM19GQ,B00ODA9JOG,B00DERBQJK’ template=’ProductCarousel’ store=’rafrti-20′ marketplace=’US’ link_id=’4f1e4ed2-c36c-11e7-bc35-7354b115823a’]

Montana Acrylic Ink 25ml bottles – $9.50

What’s more unique than mixing your own custom colors? This month we included two 25ml bottles of super high-quality fluid acrylic from Montana. Mix these two colors together to create your own unique acrylic markers. These acrylics can be used with brushes (like the one in the March box) and work well on many surfaces like paper, canvas, metal or wood.

.7mm Montana Acrylic Empty marker – $4.25

Use your new fluid acrylic bottles to fill up these empty markers in whatever color ratio you’d like! Use one for solid blue, one for solid yellow or opt for a unique color mix. These .7mm tips allow for unique precision and are great for detail work, line work, mandalas, or zentangles.

2mm Montana Acrylic Empty Marker

To add some variety in your line width, we added a thicker tipped empty pen. Use this to color larger areas or to add depth to your line work.

Derwent Graphik Line Painter – $2.89

These paint markers feature a Japanese nib and are filled with an acrylic/watercolor like opaque paint that becomes permanent when dry. The pigmented paint is water-based and solvent-free and dilutes with water. It can be used with a brush to create unique effects.

Strathmore Artist Tiles – Black – $2.79

Finally, we included some black artist tiles to really provide some contrast for your new pieces!

All in all, everything in this box is something that I will use in the future.  If you would like to get your hands on this sketchbox, or any in the future, please use this link so that I can get a credit to use towards next month’s box.


August Zen Art Challenge – Days 6 – 10

The second mandala for the month of August covers days 6-10.  This mandala was pretty difficult when I got into it. I had to really think about how each pattern would fit into the mandala so that it flowed and looked decent enough.  Here are the links for the next five patterns of this challenge created by Mindful Creativity.

Day 6 – Clamz – https://www.pinterest.com/pin/45247171239206539/

Day 7 – Stap voor Stap – https://www.pinterest.com/pin/45247171239206545/

Day 8 – HollyHock – https://www.pinterest.com/pin/45247171239206546/

Day 9 – Banana Braid – https://www.pinterest.com/pin/45247171239206547/

Day 10 -“Unknown” (Feather) – https://www.pinterest.com/pin/45247171239206548/

And here is what I came up with. Just like with the first five days, I started from the inside and moved outward. Day one was easy as it just filled the center beautifully. I would have to say that the most difficult pattern of this mandala was definitely HollyHock being right next to Banana Braid, but using stippling for the white space made it flow just fine.

I would love to know your favorite part of this mandala and if you participate in the challenge as well in the comments below. I also always welcome comments, suggestions and constructive criticism.

August Zen Art Challenge – Days 1 – 5

As you may be aware, this is my second month doing the Zen Art Challenge created by Mindful Creativity.  I wanted to push myself to think outside the box and do something a little different with this month. I have decided to make a mandala out of each five day span. Below is a link to the first five days of this challenge. It takes you to her Pinterest board, where she keeps track of these.

Day 1 – WELL – https://www.pinterest.com/pin/45247171239206499/

Day 2 – Ausheklis – https://www.pinterest.com/pin/45247171239206511/

Day 3 – Patience – https://www.pinterest.com/pin/45247171239206538/

Day 4 – Dragontail – https://www.pinterest.com/pin/45247171239206536/

Day 5 – CurlyCrown – https://www.pinterest.com/pin/45247171239206544/

Starting with day one I began in the center. I don’t like four petal flowers as I have stated before, but I know that part of the challenge, at least for me, is to use every pattern in a different way. So here is what I came up with. Can you see the progression of each day?

Please let me know if you like to see this type of challenge and which pattern you like most on this mandala in the comments below!

Zen Art Challenge – Day 23-31

This is the fourth and final post on July’s Zen Art Challenge. There are a few things that I have taken away from this challenge. The first thing is that drawing every day is important, even if it is just a simple tangle on a scrap paper. Practice makes perfect and your skills will just get better the more you practice.  The second thing this challenge taught me is that it is ok not to be perfect. WHAT?!?! you say? Yes, it is okay NOT to be perfect. Learning tangles is so fun for me, but some of the tangles are not thrilling to draw. This challenge allows me to be introduced to new patterns while challenging me to learn new ways to draw them.  Without further ado, here are the final days in July’s Zen Art Challenge.


Day 23 – Belltemps

This tangle actually took me two sittings to complete. In my head, it was not this detailed, but once I started it, I couldn’t stop.  I wanted to add so much more complications to this, but honestly, I think the stripes achieved the look of complexity, without the work of complexity.

Day 24- Tami

Take a look at this tangle. A heart with an upside down fleur-de-lis in the center. I tried making this a border tangle like the examples given, but it didn’t appeal to me. So, the best thing I could do was create something more intense. Using this shape as the outline, I filled in the shape with tiny flowers and leaves to bring the whole thing to life. I felt like I was peering through a fence into a beautiful secret garden.

Day 25 – Ovolution

This pattern did not appeal to me at all. I am not sure if it is because of the shape itself, or the fact that each of the main lines is not equally apart from each other. There is almost no way to make these perfect as I walked around the oval many times before settling on this one.  My eye twitched as I tried to make the best of this despite my perfectionism trying to break through. Letting go of this is one of the hardest parts of this whole challenge.

Day 26 – Tore Up

This tangle was fun and I had done this sorta thing previously, you can find that post here. But making a hole in the center of the page was a little more difficult than I originally thought. I thought exposing a woven pattern underneath worked out great for this as well.  I did a little shading with the pen but didn’t look at the outermost line, which looking back now I think I should have.

Day 27 – Deebops

This tangle was too cute. From fireworks to flowers to hair, I could have gone so many different directions. I chose to use this tangle to create dandelions blowing in the wind. I love the way it turned out.

Day 28 – Spearl

This one was too adorable. I just knew that I wanted to create a abstract like piece with this. I added circles to the strings themselves and I think it just made the individual colors pop. I could see something like this hanging in my art room.

Day 29 – 4-Bol

I have to admit. I do not like 4 petal flowers. Its too boxy for me. I love when there are at least six petals, but in my personal opinion, the more the merrier. So this pattern was really difficult for me to even get in the mood for. But, Its done and I learned a new element to use in the future.

Day 30 – Chities & Day 31 – Mike the Mouse

Of course I had to give Mike the Mouse a home, and where better to do that then a beautiful mushroom garden. I would like to color this just because it is so cute, but I have to practice my techniques before I dive into a finished piece. I would love to know what you think about the elements in this picture. Definitely let me know  in the comments below.

Ok, That was it for the month of July 2017. I finished the challenge. I know there is one for August and I am planning something special for that one so stay tuned! Let me know which pattern was your favorite and if you participated in the challenge.

Showcase Sunday #16 – Gaby Garcia

In this week’s Showcase Sunday, I would like to introduce you to Gaby Garcia and her blog Iamcraftygirl. I was so blessed to come across her blog when I was going through one of my go-to websites for zentangle challenges. As soon as I saw her blog, I just knew I wanted her to be a part of this series. One of the amazing things about her is that she is very thorough and organized. But she isn’t just good at zentangle patterns, she will astound you with her other crafty skills. I know I can learn so much from her and plan to be back for sure. Be sure to check out her patterns for yourself to understand the true beauty behind her relaxation techniques. But before you jump over there, learn a little more about her from the interview below.

What made you get into blogging?

I guess there were two reasons. First, I wanted to keep track of all my work with some kind of Art Journal instead of drawings spread all over drawers and shelves in my house. Secondly and most important, I wanted to share my work with the world, I felt that creating something just for myself didn’t really hold much meaning, but by releasing it to the world might inspire someone on their own work, or touch them in some way; that is what gives it a meaning.

Have you ever had any formal training or education in your blog subject?

Not really, most of what I do I have learn from watching YouTube videos and tutorials, reading all sort of blogs in the subjects I like, and simply by looking at other artists work in Pinterest.

What was your greatest failure and how did you learn from it?

My biggest regret would be that years ago I went to study Graphic Design, but after a few weeks into it I realized that most of the other students were already far more advanced than me, which made me doubt myself and quite honestly scared me, so I dropped out and went to study and graduated as a Psychologist. However Art kept coming back to me, until I understood that Art makes me happy and will always be a big part of me.  So I have learn to follow my heart and not compare it or myself to other Artists; I recognized that we are all simply at different levels of learning.

In other words I learn (and still working on it) to not let fear get in the way and stop me from doing what I love.  I keep reminding myself that all the masters started from the very basics just like you and me, they simply have had more time practicing and working on their craft.

Who has influenced you the most with your blog?

Adele Bruno with her blog and challenge “It’s a String Thing” (www.tickledtotangle.blogspot.ca), Lily Moon with her amazing Art in her blog “Lily’s Tangles” (www.zenlilymoon.blogstpot.com), and my husband with all his support and encouragement.

How much time do you spend blogging in any given week?

I spend about an hour or two writing my Blog, plus around an hour or two creating each drawing, so it really depends on how many drawings I was able to do in that week. Most weeks I do a post with about two drawings.

Is blogging your profession or just a hobby?

At the moment it is just a hobby; my family needs and work always come first.

What is your passion?

Besides my Family, Yoga and everything Art related.

What relaxation techniques do you use?

Drawing Zentangles always relaxes me, especially when I am repeating and repeating some of the easy tangles where I don’t really have to think anymore, like “Tipple”, Flux”, and “Printemps”. Coloring is another activity that helps me unwind since I was a little girl; and last but not least, I make an effort to  practice Yoga at least four days a week.

You mention your family a lot, Do you introduce them to the readers as well?

Not really. I am kind of a reserved person, so I try to keep my personal life private.

Have you ever designed or wanted to design a tangle?

Yes, I have a couple tangles I have designed. I have only published one so far  in my blog, it is called “Deco Scrolls”  you can find the post here (http://iamcraftygirl.weebly.com/blog/deco-scrolls-my-new-tangle-pattern)  I haven’t  had the time to add the other ones yet… but it is definitely in my to do list.

What is your ultimate goal in life?

To enjoy life at the fullest, to be a great Mom and Wife; to become more spiritual and compassionate, to see every day the beauty around me even in the most simple things; to be healthy and happy and to be able to touch other lives thru my work.

What legacy would you like to leave behind?

I would love to be able to touch others thru my Art, to bring them a moment of joy, peace or love with it. If it inspire them even if for a moment it would be amazing.

Is there anything you would like the readers to know about your blog we haven’t covered?

I would like to say that I am not an expert in the subject, in fact I think of myself as beginner; but I make an effort explaining which supplies I used and techniques so it can help anyone who is just starting.

Don’t just take my word for it, please visit her blog and let her know that you saw her here on “Sunday Showcase.”

As always, If you would like your blog to be featured on here, please do not hesitate to email me at craftyartistkc@gmail.com and I would love to feature you next sunday.

[amazon_link asins=’1592538118,1784941077,1441316310,1631592572,1574214276,1574219049,1454919027,1784282480,1784042846′ template=’ProductCarousel’ store=’rafrti-20′ marketplace=’US’ link_id=’5d3106be-6caf-11e7-b3d1-5b44aa3396ba’]

Zen Art Challenge with Mindful Creativity – Days 15-22

Yay! We have reached week 3 in this months challenge. I know I am late posting this but life is crazy right now and I left this post in my drafts section. Normally I schedule the post and it works out great, however, this time I failed miserably at it. I had been trying my best to do only mono tangles, but as you can tell towards the end, I had to start combining them. Also, You might notice that I have eight days included instead of just seven. This is due to how I combined them. The fourth and final post will include all the tangles up into the end of the month. You won’t want to miss it!


Day 15 – ‘Unknown’

This border tangle looked way too snake-like for me, so I just went with it. I penciled in a log because I am just not sure if I am going to keep it or not. I felt like this tangle needed a background. Until I figure out what the background should be, I am just going to leave it penciled like this. What are your thoughts on a possible background? Let me know in the comments below, as I am always open for suggestions.

Day 16 – Breach

This is hands-down one of my favorites so far. Instead of doing each petal the same, I thought it would be wonderful to do a variation sampler of sorts. I love the way it turned out and how different each pattern came out. I embellished the ends with another tangle called beadlines. I think it finished it up nicely and complimented the main focus tangle.

Day 17 – Lacy, Day 18 – Jasmine, Day 19 – Deelish

I decided to mix all of these up into one mandala. How awesome did it turn out? You be the judge. I will say that I really enjoyed forcing myself out of my comfort zone with this one. Started the center out with Lacy. I decided to use stippling as the shading for the center of each square, I think that it gave it another dimension. The next layer is Jasmine. Now I will say that I did not like the examples of this tangle at all. it didn’t make sense to me as a grid pattern. It made more sense to me as a full circle or a border pattern, so I used it here. I did a little embellishing adding a single petal between each, but it worked out fantastically. Finishing it off with Deelish. This pattern is so versatile. I decided to bring the stippling out to the border to give the whole piece a finishing touch.

Day 20 – Strimonds, Day 21 – Zixts, Day 22 – Balloya

So as you can tell, I decided to do another combination piece. Combining tangles is always something that requires a little thought in how you want the finished product to look like.  In the very center, I decided to add the Strimonds as the centerpiece. This pattern is a great filler for most but it didn’t appeal to me, so I didn’t want much space to be covered with this tangle. I surrounded it with my rendition of Balloya. All of the examples have this pattern with three sides, however, I knew that I needed this to be the bulk of the piece. Finally, I decided to embellish the outer area with Zixts. Its such a fun tangle and worked well with Strimonds, as they looked very similar. All in all, I really can appreciate the color shading which brought a little, fun, into the piece as well.

I would love to know what your favorite tangle mentioned in this post was. Please let me know in the comments below.

[amazon_link asins=’1592538118,1574219049,1441316310,1454919027,B0008G8G8Y,1784941077,1574214276′ template=’ProductCarousel’ store=’rafrti-20′ marketplace=’US’ link_id=’b5e9365d-6c2c-11e7-a4f3-1765ebe97dec’]

What did my first mandala look like?

I remember my first mandala. I wasn’t even trying to make a mandala, I just thought it was pleasing to look at. I toyed around with the different colors and just tried to make it fun. Then someone told me to try for more detail. I just tried different designs until I saw something I liked. As you can see in the first few, They are VERY similar.

As I progressed, I started making more details, trying new things. I fell in love with mandalas. It was here that I was introduced to Zentangle. What is zentangle you ask? Well, It is a progression of 3 or fewer strokes that create a pattern. They are very easy strokes that I would venture to say that anyone could follow. The beauty of zentangle is that there are no mistakes. You just have to keep building, and you would be amazed at what comes out.

All of the sudden, I decided to make them permanent.  I used a pen, Staedtler pens to be exact. I will say that the one tip or suggestion I would give is that if you think you made a mistake, just continue to make it all the way around. You’d be surprised how many mistakes I made in the following Mandala.

And just like that, I was born. I found such relaxation in the patterns and the strokes of my art. I became addicted. I watched YouTube videos galore. and I just went with it. Being the OCD person that I am, I found that it was easy to “fix” my mistakes by following them through.

What do you think about these? The patterns are mesmerizing. I have decided any mandala I do, I want to be bigger and more detailed than the last. I want to add new patterns or design my own.  I would love any suggestions that you might have on how to make these even better!!

Which one is your favorite? Let me know in the comments below!

Zen Art Challenge with Mindful Creativity – Days 8-14

Here we are, week two of the Zen Art Challenge and I am very pleased with the way the first week went. This week seemed to push me a little future out of my comfort zone and forcing me to create pieces that I otherwise wouldn’t have attempted. This is great for me because I need that push sometimes.

Now I don’t participate in a lot of challenges, frankly because I’m crazy busy, but I love the relaxed challenges like this one that has allowed me to express myself daily and educate myself on new patterns.  Learning something new every day is a goal that I’ve had for quite some time. Whether it is a weird factoid, a crazy pattern, or some hidden gem about a family member; learning something every day has helped me stay focused on always bettering myself as a person. You should try it! One day I will have the time to keep track of all these nuggets I learn, but for now, I make mental notes on these.

Okay! Without further hesitation, I present to you week two of the Zen Art Challenge for the month of July!


Day Eight – Snow White Flower

The wonderful thing about this pattern is its simplicity. I have never been drawn to a flower such as this, but it would make a beautiful art piece just in of itself. I toyed around with different ways to integrate this pattern, and truly the best way is to group it. Although you can face this either direction I thought they were beautiful all facing one way. I also added some fescue at the bottom just to fill in some lines and then a swirl frame just to add an interesting element.


Day Nine – Turned Over

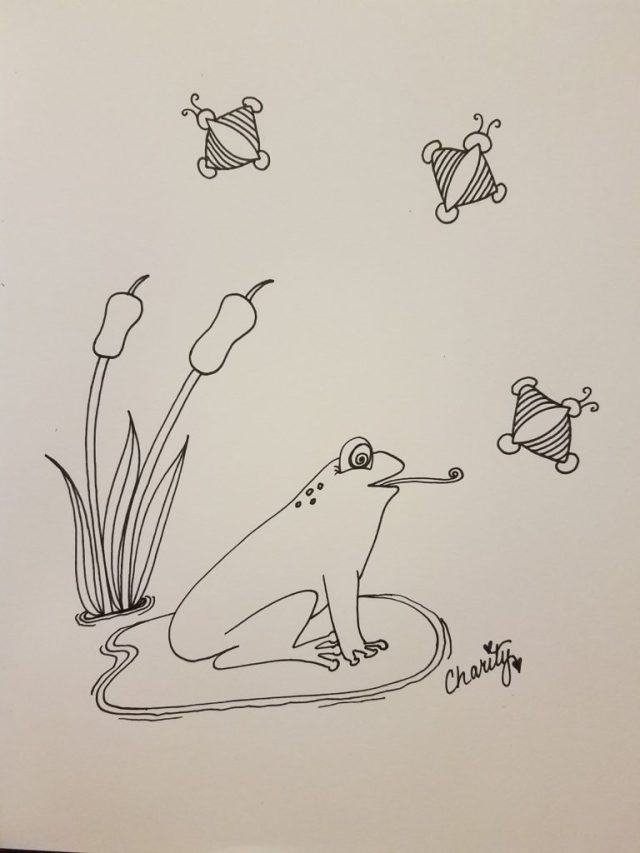
This pattern was… how do you say? Complicated? Let me explain. The pattern itself is great as a string, It flows wonderfully. I thought of using it as a string separating some other designs, but in the end, I felt like they looked better as a single unit.  They looked like flies, and what eats flies? Well, I’m sure a lot of things, but I decided on the Frog. Now, something you should understand is, I do not draw people or animals. I can not ever get the proportions correct and it ends up frustrating me to no end. But, I thought I would try a little Frog. The environment I put the pattern in looked better than the frog itself, but it was the best I could do today. Maybe later in life, I will focus more on animals, but for now, I’d like to just enjoy abstract patterns and mandala.

Day 10 – Urban Spinner

What can I say about this pattern? At first, I was very skeptical that I could even do the pattern, but I at least knew I didn’t want to draw a whole page of this tangle. I have been trying my best not to join the tangles together through this challenge and instead challenge myself to complete only mono tangles per day. This is where I was torn with what exactly to do with this one. Wait, torn? YES! That’s it! And that is how this one was born!

Day 11 – Triaxal

This tangle was very very boring to me. I decided to spruce it up with a lot more tangles and designs without using any of the tangles from the other days of the challenge. Overall, It seems like the ones that I am the most unsure about are the ones that I get the most responses on. Most of my followers loved the colors that I chose on this. Since I am still learning colors, I just tried to make it look pretty.

Day 12 – Tulips

Okay, I went way overboard on this tangle but just look at the results. I couldn’t believe that so much has been added to the original tangle. I felt like this looked like lace or a Christmas tree. Either way, because the tangle name was Tulips, I knew that I needed to make sure it looked like a garden! I love the way this one turned out and it looks way more difficult than it was to draw. If you want to add some things to a tangle to make it look more intense, just remember that whatever you change, change it the same way each time.

Day 13 – Liefie

When I first saw this tangle, I was a little hesitant. I wasn’t sure how I could turn this tangle into something that I could actually be proud of. In my opinion, this tangle was complete. There was no way to build on it until I figured out a way to introduce it in the shape of a mandala. When I was done with this, I was proud of this dainty work of art.

Day 14 – Feather

There is no way I could NOT like this tangle. I use it so often in one form or another. I couldn’t help but turn this into a beautiful crown fit for a beautiful island princess. Of course, it didn’t start out that way. I wouldn’t lie to you like that. All I know is that I love grouping tangles like this together. By the time it was over, it looked like this. Sometimes I don’t plan out the piece and it turns out sorta Meh, however, this one made me brush the eraser shavings off my shoulder in an “I meant to do that the whole time” sorta way.

So, here we are at the end of week 2 and I am just loving this challenge a little more every day. What was your favorite tangle mentioned in this post? Let me know in the comments below!

[amazon_link asins=’B0007OEE7E,B01CNYZ35C,B004L87XRA’ template=’ProductCarousel’ store=’rafrti-20′ marketplace=’US’ link_id=’b34726b8-6c1f-11e7-9bdd-7b7cfb0a24f7′]

Zen Art Challenge with Mindful Creativity – Days 1 – 7

I was in the middle of my day to day operations with my creative business when I received a message from my friend Shri informing me of this zen art challenge. I was a little hesitant because this is my birth month and typically is one of my busiest.  But, with the relaxed rules, it seemed like the challenge for me.  This challenge is a different zentangle pattern per day, drawn anyway you would like, and on any day you would like. Her challenge is to learn a new pattern and use it in a new way each day. Essentially, practicing every day will make you better at it.

Although this has always been my mindset, sometimes I sit down and wonder what will come out of the pen or pencil in my hand. This gives me a vacation from thinking something up, instead it pushes me out of my comfort zone and forces me to think outside the box to create something new. I have enjoyed the challenge so far. I am hoping to post weekly to show you the ones I have completed so far. So let’s get started!


Day One – LaFlor

This pattern is one that I learned previously but haven’t really experimented with it since I learned it. I decided that the best thing for me to do here is to fill my sketchbook as well as experiment with some color. Let me tell you that I really feel like I should have penciled this out first because the bottom one looks a little off to me. But here it is:

Day Two – C-Yeah

This pattern is completely new to me. I thought that I would continue with the color theme and try to do something different. However, I feel like now that I have experimented with it a little, I could see it as a part of my floral designs I love to do.

Day Three – Spinrose

Okay, This one I actually really love. When I first looked up the pattern I was not amused by its simplicity. But I knew that I could make something amazing out of it. So I drew it out like the instructions say, and I drew it again, and I even drew it a third time.  Then all at once in clicked! I knew I was making a mandala from this. I am so happy with how it turned out and I hope that you are too!


Day Four – Pystyl
This pattern is new to me. Its not a crazy cool pattern, but I had to make use of it anyways. Other than making it a flower, I really didn’t see the pattern going beyond a stand alone piece. Which is okay by me because I like to add little elements in my drawings that I have seen and use them in a way that is a little non-traditional. With that said, I am pretty sure that I will be using this one in the future.


Day Five – Boundary
This pattern was  very fun. The possibilities were endless. I love everything that I have seen with these, but of course, I am always drawn to the mandala and therefore, I worked on integrating this in my current piece. it worked out perfectly, in my opinion. Once I was done with the mandala, I wanted to add some design elements at the bottom that would elongate the mandala. Almost to the point of it moving towards a dream catcher.

Day Six – Kurllz

This pattern was so weird and it has gotten several reactions from those that have seen it. Either it looks like beads on ribbon, which was the objective, or it looks like tape worms. There is no in between. Regardless of what anyone else says, I love this pattern and will definitely be using it in the future. It just works wonderfully as a divider for multiple patterns on one page.


Day Seven – OOF
I need to confess something about this pattern. I hate it, well, hated it. I felt like it was beautiful in the right setting but by itself, it just wasn’t very appealing to me. So, in the way that I do, I had to figure out the best way to display all the elements of this pattern without taking away from the pattern’s simplicity. I only did it by creating an overlay of  rings to make it visually interesting enough for me to be able to share it with others.

Okay so there is the first week of zentangle patterns. Check back again next week as I share patterns 8-14. Let me know in the comments, which of these patterns are your favorite and which are you least favorite. I look forward to hearing from you all! And remember, if you want to join in this challenge, it is never too late.

Zentangle Pattern Organizer

I created this pdf page so that you would be able to keep your patterns organized. I’ve looked all over and I have seen a bunch of how-to’s and such, but all of them require expensive notebooks and creating your own squares. Let me just say the one thing I agree with is creating the pattern yourself in each square, as opposed to just printing off the guide. This allows you to practice the pattern as well as putting your own creative touch on each.

So, I took the work out of it. You can print these off on any printer, using whatever paper you choose, and then you can put them together in different way.

Binder – You can create a 3 ring binder specifically designed for your zentangle patterns and step outs.  You can create tabs for each letter of the alphabet, or types of pattern (organic, mechanic, borders) or you can simply put the papers in the binder for your own reference.

Expandable File – This is a great way to keep things organized as well. Although the amount of zentangle patterns out there are so vast, you can start small and build up your inventory.

File Folders – If you have the space to make a folder for each letter of the alphabet and have it at your fingertips, I highly suggest this way. You don’t have to punch holes in the paper, You can  just pull them out when you want to and put them back easily. Also, once you build up your patterns, you will discover more ways to create storage that fits your space.

Download your Zentangle Pattern Sampler here!

I would love to know how you are going to organize your zentangle patterns. Please comment below!


2017 Sketchbook – Page 15

I am using this page as a sampler of sorts. These are a few zentangle patterns that I have not used very much if at all. The outermost pattern is called Doozaly. The curtain pattern I have seen drawn so many times but this is the only time I have ever attempted it myself. I can’t find where I saw it before, but once I do find it I will update this post. Finally the one in the center is called Spoon Flowers. These are all my own ways of creating and modifying the patterns that I see. I wanted to create something that was just interesting.

Have you ever used these patterns before? If so, link your modifications below.

Diva Challenge #320 

For those of you that have been following, you know that occasionally I do a few challenges. I have my lunchtime challenge, and diva challenges and also madebyjoey challenges. Today for my lunchtime challenge, I decided to integrate a diva challenge in as well. You can see the challenge here. It requires using a tangle called “dansk”. 

So, with this challenge, I decided to use an artist’s tile to ensure that I had a small area to fill. I also decided that I wanted to add a few patterns I typically use in my drawings. I like the way it turned out even though it was my first time using this tangle. 

Have you ever used this pattern? If so, link yours in the comments below. Also try to push yourself to complete it in 45 minutes or less since this is also combined with my lunchtime challenge. 

Lunchtime Challenge

Let me introduce you to a fancy little Zentangle called “Starfish Double Barrel”. That’s right, double barrel. This is a beautiful Zentangle that I just had to tackle and make my own. It was so easy to start. From the center circle, you draw out eight long petals. As you work around the circle, you add only one layer on each side of that petal until they finally touch. Now the possibilities are endless. You can switch up the tips, you can create a wonderful center design for the rest of the starfish to pop out from, or you can simply color it in like I did.

Anyway you do it, I just hope that you get out there and experiment with this tangle. I would love to see what you come up with. You can link your experiments in the comments below.

Lunchtime Challenge

As I was thinking of what to draw, I came across this zentangle pattern called Pharro. Now this pattern starts with a curved line and then a dip below that curved line. There are lines that criss cross inside the dip, and then lines are drawn upwards to the initial curved line. Now I thought of this pattern at first as a flower. It just makes sense as a flower, but  I wanted it to be a little unique. With drops hanging off each side and a sense of life protruding from the other side of the curved line.

But as I was drawing this, something else came to mind. Unfortunately for you, I am just unable to capture exactly what is in my head because my realism craft is very premature. But I wanted to give a little taste of this underwater jester I created out of this same pattern. It was fun to create, and pushed the boundaries of my abilities at the moment. Hopefully I will get better in the future.


I had fun creating each of these artist tiles over my lunch break, which was approximately 45 minutes. If I had actually sat down and focused on the ending design, I may have been able to come up with something better. But alas, this is the point of my lunchtime doodles. I want to push myself creatively in the few minutes I have set aside for lunch.

Let me know what you think of each of these in the comments below. Don’t be afraid to critique and link back to any Pharro designs you have come up with.

Lunchtime Challenge

As you guys are well aware, I have a mere 45 minutes to doodle or unplug as I like to call it. I have been taking my Artists Tiles to work to do just that. This piece is pretty small, It is on a 3×3 square. Although it is blown up pretty big here, I promise it was small.

I love these small tiles because of the time restraint I have, I can devote just enough time to trying out new patterns. Let me know what you think about this in the comments below!

2017 Sketchbook – Page 5

So could I just leave this here without any words? No I don’t think so. I wanted to make a bunch of flowers, however, It didn’t really turn out like I wanted it to. So, I built some circles around it. I can’t scratch this and move on because it is in my journal, so I kept adding details until it somewhat resembled something I could post.

What are your thoughts on this piece? Tell me in the comments below.

Crafty Web Mandala!

This mandala came to be long before I really got into Zentangle, but it implements so many principles of that. This mandala was created a while ago, but I realized I hadn’t shared it yet with you guys. Since my current project is taking longer than one sitting, I decided to share it.

I would love to know what you feel about this piece. Please tell me in the comments below!

Do You Zentangle?

Zentangle is an art form that teaches you how to use relaxing strokes to create beautiful works of art. Sometimes you’ll see me referencing Zentangle as it has really taught me a lot about different techniques. I store my Zentangle Patterns in a photo book I purchased for barely anything. It holds standard sized photos and its is perfect for what I need it for, which is a reference book.

There are a vast amount of patterns and almost just as many sites that are designed to show you versions of each. One of my favorite websites, TanglePatterns is one of the most complete sites I have found for the patterns, short of buying a book, this is my go-to way to learn new patterns.

I would greatly encourage all artists no matter what your skill to check out this wonderful method that is sweeping the world. Fall in love with each pattern the way I have.

Have you heard of the Zentangle Method before? If you have, please tell me in the comments below which is your favorite and if you have found any sites specifically designed for this method.

I look forward to learning more about you all!